Friday, January 20, 2012

Egg Salad Sandwich Nostalgia

My mother is an amazing woman! She was widowed at a young age and had 4 little children to take care of. I don’t know how she managed to do that, but she did.

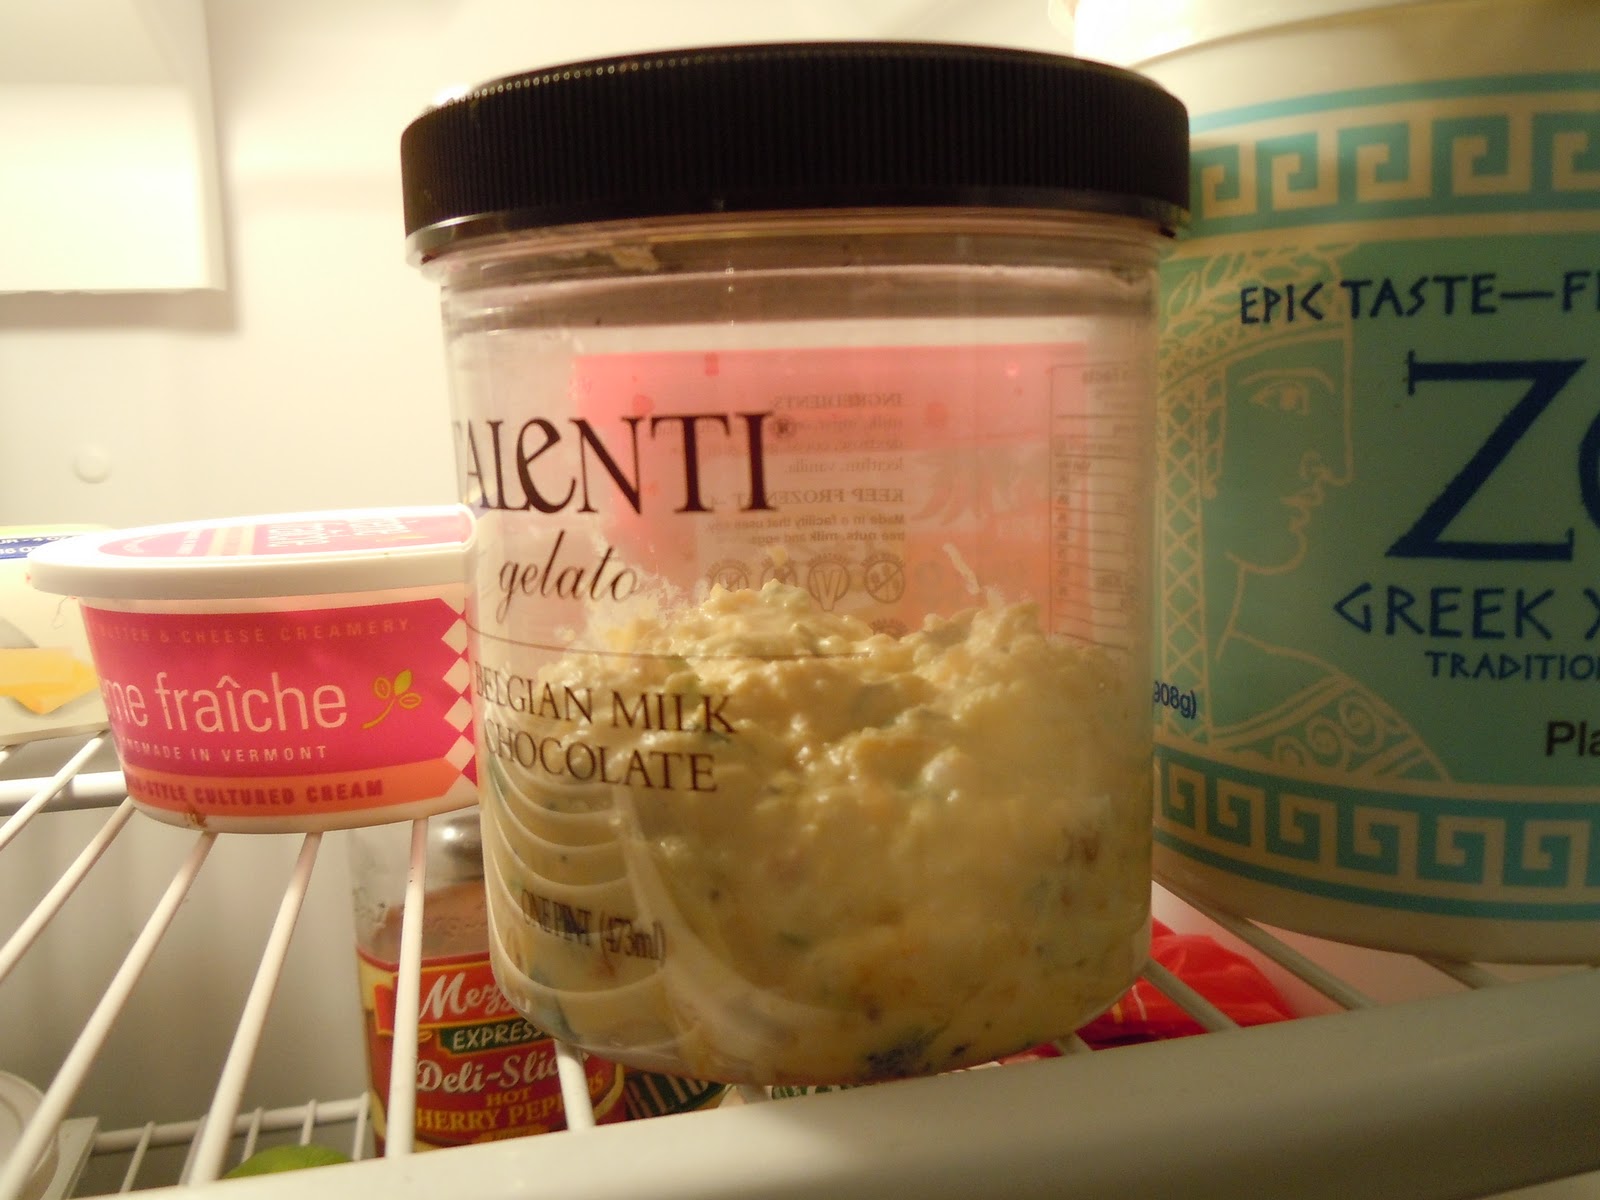
One of the things I fondly reminisce about my childhood days is my mother’s egg salad sandwich spread. She would make a big batch of it on Sundays and store it in a recycled mayonnaise jar. Then we can take egg salad sandwiches to school to snack on!

Her original recipe used hard boiled eggs and mayonnaise. But, I make mine a little different just because I happened to have this idea one day and decided to try it… and it turned out good. It’s quite different from my mom’s, but very tasty all the same.     


Egg Salad Sandwich
queso fresco

1 tsp olive oil
2 sage leaves, torn
2 large eggs
2 stalks green onions, minced
4 tbsp plain, whole milk Greek yogurt
4 tbsp queso fresco, shredded
1 tbsp cheddar cheese, shredded
dashes of Tabasco (however much you want)
pinch of salt, to taste


Heat olive oil in a non-stick pan. Over medium heat, cook sage in the oil for about 2-3 minutes until they turn brownish.

Crack eggs and sprinkle the top with salt and pepper. Fry eggs in pan until the yolks are well-done, about 6-8 minutes. The bottom will turn brown, but that’s ok. The burnt part adds flavor and texture. Put a lid over pan to help the yolks cook better. Move eggs into a medium mixing bowl.
 
Return pan to the burner without the heat on and stir the green onions in the leftover heat.

Meanwhile, shred the eggs into small pieces. Add yogurt, queso fresco, cheddar cheese, tabasco, salt, and green onions. Mix all ingredients together.


Use right away...  


Look Ma! My egg salad is in a recycled container too!
Love you!


... or store in an airtight container in the refrigerator.   

Thursday, January 19, 2012

Mocha Muffins turned into a... Mocha Cake

One of the 4 recipe books I got for Christmas is Best Ever MUFFINS, Cupcakes and Other Baked Treats. So far I have baked out of it twice. Both treats were delish! The post for the other one will be for later because I didn’t take pictures of it. This mochalicious delight has a perfect mix of chocolate and cranberry morsels that adds a touch of sweetness to every bite.


This Mocha Cake recipe is actually supposed to be baked into muffins… but I was in a time crunch and just decided to pour the entire batter into a cake pan. Some of the ingredients required in the original recipe were strong coffee, instant coffee powder, almond extract, and raisins. I substituted them with espresso, cacao nibs, vanilla extract, and cranberries.

When a muffin recipe is turned into a cake, you should not feel unclassy for eating it without a fork during the day… a slice can be treated like a muffin. However, I recommend using a fork if you decide to have it for dessert after dinner.

flour mixture
cocoa nibs, chocolate chips, cranberries
the batter
cocoa topping
ready to be popped in the oven


Mocha Cake (Makes 10 servings)
(adapted from Best Ever Muffins, Cupcakes, and Other Baked Treats)

vegetable oil spray, for pan
1 ¾ cups all-purpose flour
1 tbsp baking powder
2 tbsp unsweetened cocoa
pinch of salt
4 oz butter, melted
scant ¾ cup raw sugar
1 large egg, beaten
1 cup milk (I used nonfat and it turned out ok)
1 ½ tsp vanilla extract
2 tbsp espresso
1 tbsp cacao nibs (Scharffen Berger)
¼ cup semisweet chocolate chips
generous 1/3 cup cranberries

Cocoa Topping
3 tbsp raw sugar
1 tbsp unsweetened cocoa
1 tsp allspice


Spray the cake pan with vegetable oil. (I coated it with the leftover melted butter.)

Sift the flour, baking powder, cocoa, and salt into a large mixing bowl.
Put cacao nibs, chocolate chips, and cranberries in a small bowl.
Add the cranberry mixture to the flour mixture and stir together.

In a separate bowl, cream the butter and raw sugar together, then stir in beaten egg.
Pour in the milk, vanilla extract, and espresso.
Gently mix together.

Add the wet mixture to the dry mixture and gently stir together until just combined.
Do not overstir the batter. It’s ok for it to be a little lumpy.
 
Pour the batter into the oiled/buttered cake pan.

Make the topping by mixing the sugar, cocoa, and all-spice really well in a small bowl.
Sprinkle the topping over the batter and move the pan into a preheated oven, 375 degrees F, and bake for about 28 minutes.

Check for doneness by inserting a toothpick in the middle of the cake… you’re all set if it comes out clean. Don’t be tricked if there’s gooey stuff on the toothpick, you might have stabbed a chocolate chip, so try inserting the toothpick in another spot.

I recommend making this recipe into muffins, like it should be. It makes 12. For muffins, pour the batter into a muffin pan, lined with paper liners (or not), and move it into an oven preheated to 375 degrees F, for 20 minutes or until risen.

ENJOY!


Wednesday, January 18, 2012


Fudge Love
Question:
What do you do when you have about 5 pounds worth of sinfully delicious fudge on the kitchen table and happen to be hoping for a late start the next day?
Answer:
Put on your comfiest sweats, light a candle, tune in to Pandora, and play Scrabble while drinking tea and EATING FUDGE!

 
 We were neck and neck, so I wasn't so sad when I lost by a mere 3 points.


Question:
How was the fudge?
Answer:
Amazing! Try it yourself! Pretty please…? It’s definitely worth your while. Promise!
Question:
How?
Answer:
Easy... use this recipe. It is sooooo good... Wish I could take credit for this fudge, but I had a busy day (last Sunday)… went to a yoga class, hiked a mini-mountain with some friends, and went on a walk date with a girlfriend… and when I got home, my boyfriend was already commanding it to call my name. This is easy breezy, he said it took him less than 30 minutes to make it. 

Mamie Eisenhower’s Fudge (adapted) 
(makes about 5 pounds and yields 120 servings… YIKES!)
  • 4 ½ cups sugar
  • 2 tbsp butter
  • 1/16th tsp salt
  • 12 oz evaporated milk
  • 3 bars of 4 oz Ghirardelli baking chocolate
  • 12 oz semisweet chocolate chips
  • 7 oz jar of marshmallow crème (the original recipe calls for 2 cups of marshmallow crème, but just a 7 oz jar works just fine)
  • 2 cups chopped pecans

1. In a large saucepan, stir together the sugar, butter, salt, and evaporated milk.
2. Bring the pan to a boil over medium heat, stirring often.
3. Boil for 6 minutes, stir occasionally and scrape the sides.
4. In a large mixing bowl, mix the chocolates, marshmallow, and pecans. 
5. Pour syrup over chocolate and beat until chocolate melts.
6. Move into a greased 9x13 pan.
7. Cool until firm.
Oh yeah...


After playing Scrabble, we went on a short walk because we felt a little guilty for indulging instead of working out… the air was warm”ish” (it was about 40 degrees) and there was not a single drop of precipitation from the sky… *Sigh* So much for late start.

I said a little prayer before bedtime… and when I woke up… VOILA!


Work was delayed for 2 hours. Short and sweet work day! When I got home, we decided to trek to the gym… did some serious ab workout and yoga… then walked back home where more fudge awaited.


Tuesday, January 17, 2012

On Missing the Farmer's Market + Making Your Own Granola

Farmer's Markets are one of the things I look forward to on Saturday mornings (and/or Wednesday afternoons... and/or Friday mornings) during the summer. Now that it's cold and produce is imported from far, far away or "fresh" out of warehouse storage, I miss it so much!

Pike's Place Market, Seattle


10 Things I Love About Farmer's Markets:

1. FRESH fruits and vegetables in season... when they taste so good they almost don't need to be cooked or overdosed with salt and pepper.
2. Bright smiles and cheerful greetings from local vendors.
3. Friendly chats with the farmers and running into friends.
4. The fruit samples!!!
5. If you get there late when they're almost done and the crowd is dwindling, these nice vendors give you great deals and something more of this and that. (Yeah, I'm cheap like that...)
6. Standing by the cheese makers while eating your tacos and getting an extra sprinkling of fresh chevre!
7. Winning an awesome door prize: 10 pounds of apples! Especially if a strong boyfriend happened to tag along to save you from shoulder injury. :)
8. Discovering new vegetables (new to me, at least) and how to cook them.
9. Buying real honey.
10. The smells wafting from the food stalls... tacos, donuts, phad thai, grilled meat... YUMMM!!!


As much as I love Farmer’s Markets, it makes me sad that the “artisan” food products tend to be overpriced. For instance, the fancy granola sold in our market costs $20/2 lbs. Half of that is one serving for my guy! Now, I know that a lot of hard work goes into everything handmade and homemade, and I appreciate food products like that. However, it is too spendy for me and is definitely beyond my budget. So, I decided to take matters into my own hands and started making my own granola. You should do it too, if you’re not already doing it!

Here are two granola recipes that I found to be the best… I picked the recipes that use less sweeteners and adapted them to cut back on the sugars even more and to accommodate for the ingredients that I had in the pantry. They turned out wonderful! Really, you can’t go wrong with toasted oats, honey, nuts, and dried cranberries!


This one uses just ¼ cup of honey for a touch of sweetness!

Easy Granola (Makes about 5 cups)
(adapted from The America’s Test Kitchen Family Cookbook)

½ cup sliced almonds
½ cup chopped cashews
¼ cup walnuts
2 cups old-fashioned rolled oats
¼ cup sunflower seeds
¼ cup honey
2 tbsp vegetable oil
½ cup dried cranberries
¼ cup currants or raisins

Toast almonds, cashews, and walnuts in a nonstick pan over medium heat. Stir often for about 3 minutes.
Stir in the oats for about 2 minutes.
Add sunflower seeds and stir for about 1 minute.
Away from the heat, stir in the honey and oil until the mixture is well coated.
Spread the granola in a deep baking pan.
Bake the granola at 325 degrees.
Stir every 5 minutes for 15-20 minutes, until the granola is golden brown.
Out of the oven, stir in the cranberries and currants or raisins.
Let the granola cool to room temperature and move to an airtight container.


I was stingy with the sweeteners on this second one and omitted the shredded coconut to cut back on extra sugar and fat. Tell you what though, my boyfriend’s mom followed the original recipe (http://www.foodnetwork.com/recipes/alton-brown/granola-recipe/index.html) and it was the best granola I have ever tasted . Well, this one is almost as good… I say almost because you can’t compete with extra sugar and maple syrup. ;)

Delicious Granola (Makes about 8 cups)
(adapted from Alton Brown, Food Network)

3 cups old-fashioned rolled oats
1 cup sliced almonds
½ cup cashews
½ cup walnuts
¼ cup sunflower seeds
¼ cup maple syrup
3 tbsp honey
2 tsp vegetable oil
2 tbsp brown sugar
½ cup dried cranberries
½ cup currants
or 1 cup of whatever dried fruit you desire


In a deep, large baking pan, mix oats, almonds, cashews, walnuts, and sunflower seeds.
In a small bowl, combine maple syrup, honey, and oil.
Pour syrup mixture into the oat mixture and stir until well coated.
Cook for 1 hour and 15 minutes in an oven preheated to 250 degrees F.
Stir every 15 minutes to cook everything evenly.
Remove from oven and add cranberries and currants. Mix until evenly distributed.
Let the granola cool to room temperature and move to an airtight container.


Designate Sunday afternoons as granola making time… it only takes about an hour or two. Enjoy!