Sunday, May 26, 2013

French-Style Yogurt Cake with Lemon

Events have unfolded… I need to take a deep breath and accept things as they happen one day at a time. DFJ got a job in Maryland and we are moving. Yes, moving thousands of miles away from a place we now consider home. I took one big luggage with me halfway around the world 6 years ago and stepped into a new country with no idea what life here would be like and everything turned out well. In fact, it was even better than what I had ever dreamed of. I was taken care of by the most gracious and loving host parents, made good friends who helped me feel at home, worked with really awesome people, and recently got married to the most amazing man I know. Moving across the country should not be a big deal, right? There are good people everywhere and the biggest consolation is that I will not be moving alone this time.

But… it’s still sad and I feel the need to honor this sadness. I am also scared of stepping into yet another unknown. After this school year, I will not have a job and will be pretty much dependent on my husband until something comes up. Keep your fingers crossed for me!
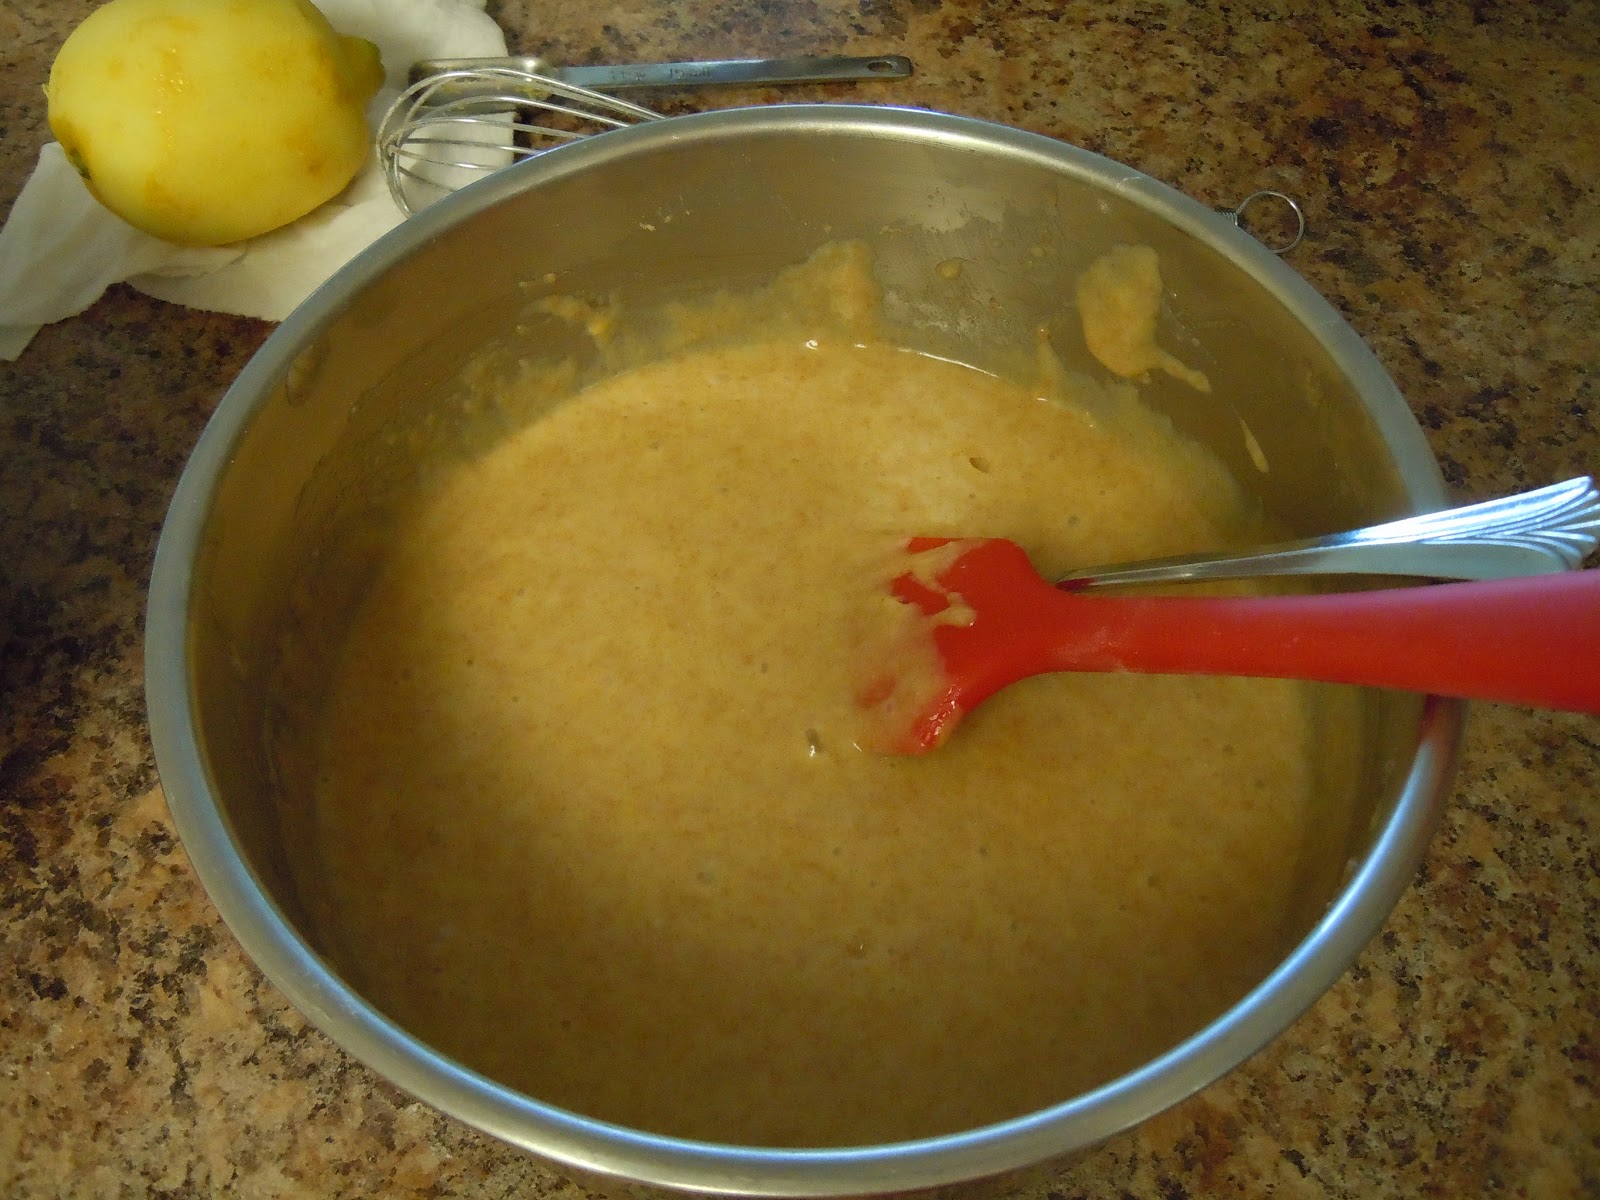
Last Sunday, as I anticipated DFJ’s return from Maryland, I baked the morning away. It was a lovely experience… I did not feel compelled to rush the process and just took my time measuring ingredients, whisking and mixing everything, gently stirring the batter, and cleaning up the mess. All of it was a familiar ritual that soothed my nerves as I was nervous and excited for this job opportunity that DFJ might get. The weirdest part was that, I was even keen about moving and toyed with the idea of starting over in a new place as a newly married couple. When DFJ got the job offer this week, I was genuinely happy for him. However, when the reality of what moving away from our life here would entail, all that excitement dissipated in an instant. That means I will have to say goodbye to the best job ever and my wonderful students, the people who have been my family here, our good friends, and our great community.


 The rollercoaster of emotions that my little heart has gone through in the past couple of days was calmed and comforted by this cake. Thank goodness I took the time to bake it last Sunday! This cake was at the centerpiece of our conversations as we pondered on what the next few months will look like. We sat at the dining table and talked about moving, summer getaways, and responsibilities until the sun disappeared, all the while digging our forks and eating bite after bite of this cake right off the platter.  

This cake is simply delicious. It is soft and moist with some heft from the spelt flour. The sweetness is gentle with surprise bursts of tartness from the lemon syrup. The olive oil gives it a roundness of flavor and the lemony tang is like a ray of sunshine in each bite.


A humble cake that celebrates both good and bittersweet moments in life.


French-Style Yogurt Cake with Lemon
Adapted from A Homemade Life, by Molly Wizenberg
 
Cake
1½ cups spelt flour (190 g or 6½ oz)
2 teaspoons baking powder (8 g or ¼ oz)
pinch of salt
3 teaspoons lemon zest
½ cup nonfat Greek yogurt (120 g or 4¼ oz), well-stirred
¾ cup sugar (150 g or 5¼ oz)
3 large eggs
½ cup olive oil (100 g or 3 5/8 oz)
 
Syrup
¼ cup lemon juice
¼ cup powdered sugar
 
a tad of butter for greasing the pan
 

Move an oven rack to the middle position and preheat the oven to 350 degrees F. Pat dots of butter all over a 9-inch, round cake pan. Use your fingers to spread the butter all over the inner surface of the pan, including the sides.

In a large bowl, whisk the flour, baking powder, and salt well together. Add the lemon zest and whisk well until the clumps are spread out evenly in the dry mixture.

In another large bowl, mix the yogurt, sugar, and eggs with a fork. Stir everything well together until smooth. Add in the flour mixture and gently stir until just combined. There should be a few traces of dry ingredients left. Pour in the olive oil and stir well. Don’t fret if it seems like the batter will never absorb the oil. Just keep stirring until all the oil is incorporated and you are left with a silky smooth batter. Pour the batter into the prepared pan.

Move the pan into the oven and bake for 26-30 minutes. Your cake is done when a toothpick or cake tester inserted in the middle comes out clean. The sides will also turn into a nice, golden brown and will slightly pull away from the pan.

Place the cake pan on a wire rack and let it cool for 15 minutes. Run a flat, plastic spatula along the sides of the cake to help it loosen up, place a plate over the cake pan, and invert the cake onto the plate. Place the cooling rack over the cake bottom and invert the cake once more so that the cake is now resting on the rack, with the top facing up. Set the rack over your serving platter and place the platter on a rimmed, baking sheet. The purpose of this baking sheet is to prevent lemon syrup spillage from going everywhere on your counter.

In a small, glass bowl, whisk well together the lemon juice and powdered sugar until all the sugar clumps disappear and the syrup is smooth. Using a spoon, pour the syrup on top of the warm cake. Some of the syrup will run down the sides. No big deal, that’s what the baking sheet is for.

Very gently slide the cake off the cooling rack onto the serving platter. Serve immediately or wait until the cake has completely cooled. It is lovely either way.       


Saturday, May 18, 2013

Roasted Kale

My husband has been away for a couple of days for some job interviews in Maryland. The apartment is pretty lonely without him. For the past two nights, I hung out with my friend, Elissa, a total sweetheart whose face and smile never fail to brighten my day. Last night would have been another fun hang time… However, I felt like being alone and enjoying some time with myself, doing the things that I like. And that’s exactly what I did, sat around while catching up with my husband on the phone, napped on the couch, dragged my butt off the couch and worked out, called my family and chatted with them while I was walking to and from the gym, and started cooking dinner when I got home.  

I had a bunch of kale that I have been meaning to cook for a few days now, but never got around to. So I took care of that and decided to roast them with leeks, garlic, ginger, a generous amount of salt, and some freshly cracked black pepper. Pretty amazing!


Kale has a distinct, earthy green taste with a tinge of bitterness. The leaves are also sturdy which helps the kale maintain its substance so that you can still taste it when you add into whatever you are cooking. Unlike spinach, it doesn’t wilt into nothing when put in contact with heat. Biting into a kale leaf and savoring its wholesome flavor always takes me to a happy place. The sturdiness of kale leaves also makes it perfect for roasting. It just made sense to toss all the ingredients in one big pan and roast them altogether for a couple of minutes. After roasting, the leeks lent a delicious sweetness, the garlic added a depth of flavor, and the ginger bites were spicy-cool.

This roasted kale went perfectly well with some quinoa. I devoured these on my yoga mat in the middle of the kitchen floor. That’s how good this meal was, I couldn’t even make it to the dining table.


Guys, before I share the roasted kale recipe, I want to share a loose recipe of the quinoa dish that I had with the kale. First, I cooked some red quinoa. Then I stir-fried minced spring onions (white and green parts), diced carrots, diced kale stems, chopped shiitake mushrooms, some dill, and a little bit of salt. I then tossed this stir fry with the quinoa and served it as a bed for the roasted kale. Delicious!        


Roasted Kale

10.5 oz or 300 g kale, roughly chopped
2 leeks (use only the white and light green parts, see *notes*), rinsed and sliced in rounds
2 tablespoons ginger, minced
2-3 large cloves garlic, minced
3 tablespoons olive oil
1 teaspoon salt
freshly cracked black pepper

Preheat the oven to 400 degrees F. While the oven is heating up, prepare the ingredients.  

Place the kale, leeks, ginger, and garlic in a large roasting pan. Pour in the olive oil and toss everything together using your hands. Add the salt and pepper and continue to mix everything using your hands.

Place the pan in the oven and roast for 8 minutes. Turn off the oven and remove the pan. Stir everything well and place the pan back in the oven for 2 more minutes.

Serve warm over a bed of quinoa!


*Notes*
Save the dark green tops of the leeks to use for making homemade stock.

Friday, May 17, 2013

Chicken Fajitas (Roasted Style)

Words are not easy to come by these days. These fajitas were made quite a while ago, but because I didn’t really have an interesting story to share, I procrastinated writing about it. Now, the memory of how these exactly tasted like is vague… but I do know one thing for sure, they were good!

 
These fajitas were made with just two chicken thighs. Not a lot of meat but that’s the way I cook… use less meat and load up on the veggies! You won’t even know what’s missing. The chicken thighs that I used were not boneless. Truthfully, I prefer chicken with their bones in, there’s just so much more flavor in them that way.


The chicken thighs roasted in the oven along with the fajita vegetables. When the chicken was done, the meat was shredded off the bones and tossed back in the roasting pan to coat them with the lime and spice-infused chicken juices. These savory shredded chicken pieces were then tossed together with the roasted vegetables. Absolutely delicious! The only thing that makes this even better is serving it with a side of guacamole.   


Roasted Chicken Fajitas

Seasoning Mix
1/2 teaspoon salt
1/2 teaspoon black pepper, freshly cracked
1/2 teaspoon cumin
1/4 teaspoon coriander
1/4 teaspoon cayenne
1/4 teaspoon paprika
1/4 teaspoon chili powder

Chicken
2 chicken thighs, bone in
1 teaspoon of seasoning mix
juice from 4-5 key limes, depending on size
2 teaspoons olive oil


Vegetables
1 medium onion, thinly sliced
1 large bell pepper, (I used green), sliced
2 carrots, sliced into fat 1 and ½ inch sticks
2 oz cremini mushrooms, or more, sliced
3 garlic cloves, smashed using the back of a spoon
1/4 teaspoon salt
2 tablespoons olive oil
the rest of the seasoning mix

corn or flour tortillas


Stir the salt, pepper, and all the spices well together in a small bowl. Set aside.

Place the chicken thighs in a non-reactive bowl. Rub a teaspoon of the seasoning on the outside of both chicken pieces. Pour in the key lime juice and olive oil. Mix everything well with your hands. Cover the bowl and place in the refrigerator to marinate for at least 2 hours. Turn the chicken pieces over so the other side also gets soaked in the marinade after an hour or so. When it is time to roast the chicken, move the pieces to a slightly oiled, small roasting pan. I used a round cake pan for this.

After chopping each vegetable ingredient, toss into a roasting pan. Sprinkle salt all over and pour in the olive oil. Mix with your hands. Add the rest of the seasoning and mix well, making sure that everything gets coated with it. Let sit in the refrigerator until the oven is ready for roasting.

Set an oven rack in the middle position and preheat the oven to 400 degrees F. Bake the chicken skin side down for 15 minutes. Pull it out of the oven and flip the chicken pieces to expose the skin and place it back in the oven. At this time, move the pan of vegetables into the oven as well. Set the timer for another 15 minutes. When the timer goes off, pull out both roasting pans. Flip the chicken pieces one more time and stir the vegetables. Place both roasting pans back in the oven and set the timer to 10 more minutes.

While the chicken is roasting, pull out your desired number of tortillas. Stack them on a piece of foil large enough to cover every inch of the tortilla stack. Completely wrap tortillas with the foil and place in the oven during the last 10 minutes of roasting time.

When the timer goes off after the last 10 minutes, turn the oven off. Pull out the chicken pan, but leave the vegetables and the tortillas. Carefully move the chicken pieces to a plate or chopping board and shred with two forks or a fork and a knife. Move the shredded chicken back to the roasting pan and stir to coat it with the juices left in the pan. Remove the vegetable pan from the oven and throw in the shredded chicken meat along with the leftover juice from the chicken pan for added flavor. Toss to mix everything together.

Carefully remove the tortillas from the oven. Serve the roasted fajitas on the tortillas with a side of guacamole and salsa or hot sauce.

Sunday, May 12, 2013

Mother’s Day + Family + Sunday + Japanese Spiced Roasted Beets

DFJ and I are enjoying a quiet Sunday… We’re just chilling, doing different things but checking in on each other every now and then. Most of the time, I still can’t believe we are husband and wife now. Every time I think about this, my heart gets so big it hurts and I feel like crying joyous tears of happiness.

My day didn’t start out great though. Early this morning, I had a terrible dream of losing my mom. In my dream, I saw myself keeping it together until I finally realized that it was real. All of a sudden I unleashed all the anguish I have been holding in and hurled myself against the wall and on the floor in despair. Finally, when I thought I couldn’t handle the pain anymore, I woke up staring at DFJ’s bare back. That’s when I realized with great relief that it was JUST a dream. Thank you, dear God! What would my life be like if I lost my mom? I don’t even want to imagine it… she is a huge part of me and I owe her so much for shaping me into the woman that I am now.  

I called home to greet my mom a Happy Mother’s Day but she wasn’t there, so I talked to my sister instead. She is so busy and unavailable every time I call home, so I was glad to finally be able to catch up with her. My little sister, whose hand I used to hold, is now a career woman. Hard to believe! She was only a senior in high school when I last saw her and thinking about how long it has been since then makes me miss her even more so. We used to sleep next to each other even in our older years and we would fall asleep holding hands for fear of ghosts. Haha!  

While my sister and I were talking, I chopped beets, parsnips, potatoes, cauliflower, asparagus, and stale bread for roasting. This week’s Food Matter’s Project, Japanese Spiced Roasted Beets, chosen by Sandra of Meadows Cooks, called for turning on the oven pretty high. Since it has been almost 100 degrees F over here for the past week, I decided to make the most out of turning on the oven and roasted as many vegetables as possible! It was a big accomplishment at 9:30 in the morning on a Sunday. To celebrate, I made us a brunch that included veggie scraps: cauliflower stalk and leaves and asparagus ends in scrambled eggs with roasted potatoes and bagels.

After brunch, DFJ went right to his laptop to prepare slides for an interview talk in Maryland next week while I cut up his old fraternity t-shirts in an attempt to make this. Not very much success since he is way bigger than I am. Instead of using my finished product as a workout tank, I will have to use it as an apron instead! No more craftiness for the day.  

Now that my so-called hamstring injury, which really was an adductor injury, which really stemmed from my scoliosis, is finally beginning to disappear, I have been doing yoga religiously for three days in a row. Nothing crazy though… I have been doing Tiffany Cruikshank’s Groin Injury Practice, Pelvis and SI Joint Stability, and Medicine for Your Hamstrings classes. Strong, gentle, healing practices for the upper legs and hips. Just what I need plus some ice! During savasana, I fell asleep on my yoga mat and woke up feeling good and ready to do some blogging!

So here I am, blabbering about things, when I really should be telling you about the Japanese Spiced Roasted Beets that I made at 9:00 this morning. Mine is a combination of three large beets, a parsnip, and a potato. I followed the rest of the original recipe quite closely, except for using only ½ teaspoon of chili powder instead of a tablespoon. One of my favorite ways to eat vegetables is in roasted form. Since they are already delicious, most of the time, I stick to just seasoning them with olive oil, salt, and pepper. However, this recipe takes roasted root vegetables to a whole new level.


This dish is a medley of earthy root vegetables, with citrusy hints, and a spicy kick. I love the different flavors that each vegetable offers and the way the seasoning combination (orange zest, poppy seed, chili powder, black pepper, sesame seeds, and scallions) gives the roasted vegetables some spunk!

 
I hope everyone had a lovely Mother’s Day celebration. Every day should be a mother’s day… these special women in our lives deserve nothing less!   


P.S.
- For the original Mark Bittman recipe of the Japanese Spiced Roasted Beets, check out Meadows Cooks.
- To see what other FMP members came up with, check out our website.

Saturday, May 11, 2013

On Fennel and Coconut Ginger Shrimp

Let’s talk about fennel! Right around Thanksgiving last year, DFJ talked about how he wanted to make roasted fennel and sweet potatoes for Thanksgiving dinner. It reminded him of the fennel we had at a delicious buffet dinner at the Keller Auditorium in Portland before watching Wicked. Before that dinner, I’ve never had fennel and before last Thanksgiving, fennel has never set foot in my house.

Now I know better… fennel is pretty amazing! It’s sweet, savory, and super versatile. You can add it to your dishes for an extra flavor complexity or you can have it be the main star with some seasonings here and there. These are the different ways I have devoured fennel: roasted either by itself or with sweet potatoes, caramelized fennel with goat cheese (from Plenty), and stir fried in vegetables. I also often find fennel bites in my fried rice and pakoras when I eat at Indian restaurants and it always makes me happy. Fennel can also be shaved and tossed in your salads!

When you buy fennel though, they come with super long stalks and fronds. For a while, I have been limiting myself to using the stalks in my vegetable stock for lack of better knowledge. Little did I know until I read this week’s FoodMatter’s recipe that the stalks can be added into pretty much anything we cook, just like we do with celery! They are even better than celery because they are so full of flavor and have a really enticing aroma. When stir-fried they end up adding a lovely hint of sweetness to your food and an extra oomph. The fronds can be cooked as well or used as pretty garnishes. To be honest, I don't think the fronds have much flavor in them, but they sure are pretty.

So, my take on this week’s FMP recipe, Stir-Fried Fennel and Pink Grapefruit with Shrimp, chosen by Camilla of Culinary Adventures with Camilla, was a little different. I cooked my shrimp separate from the vegetables because I really wanted to try this Coconut Ginger Shrimp recipe from Sassy Radish. Oh my goodness, it was so, so, so good! There is no coconut milk in the recipe but you taste coconut in every bite and the shrimp pieces are so tender. I added more fish sauce and lime juice than was required, just a touch more, and I loved how it turned out. You need to try this recipe you guys, it will transport you straight to Asia!


Then I made some stir-fried vegetables which consisted of so many good things: olive oil, garlic, onion, fennel stalks, carrots, asparagus, orange slices, Swiss chard, spinach, salt, and pepper. I think this was one of my best stir-fry vegetable dishes ever! The combination of all the different vegetables is just so fun. All the ingredients played together nicely and turned out very well. My favorite is the touch of citrusy sweetness that the orange slices added and the savory sweetness of the fennel stalks, the fennel flavor definitely popped out and made itself known. I will have to remake this and document it next time so I can share a solid recipe to all of you.  


I served the shrimp and stir-fried veggies with brown rice and dinner was served. Best dinner ever! It sure made my husband a happy man and I always take so much pleasure in that.

 
Have a great weekend you guys!!!

Sunday, May 5, 2013

Guacamole, Radish, and Egg Sandwich

Lately, I have been craving simplicity. Basic yoga poses just feel so deliciously good and rejuvenating to my body. Easy cardio activities, such as slow runs, long walks in the sun while talking to family members from afar, hikes with friends, or reading a book while on the elliptical machine gives me just the right amount of energy to continue on with my day. Simple food that asks for nothing more than olive oil, salt, and pepper has been my go to these days. It tastes good, it makes me feel good, and it makes my body smile.

So today, I offer you a humble sandwich that is equally delicious, healthy, and satisfying. All you need are a few simple ingredients and you are all set… an avocado for making guacamole, a radish or two, some fresh eggs, and good bread.


Because life has been hectic over the past few weeks, I have not been making homemade bread, so I used Dave’s Killer Bread for this open-face sandwich. I love its flavor and texture and all the good grains that are in it! You don’t have to just use sandwich bread for this, you can use sourdough, French bread, whatever you have works.


 Guacamole, Radish, and Egg Sandwich (Makes 4 open-face sandwiches)

4 slices of bread (toasted or not, whatever you prefer)
guacamole (recipe below)
1-2 radish bulbs, thinly sliced
2 boiled eggs, sliced (hard-boiled or soft, whatever you prefer)
smoked salt (fleur de sel or just Kosher salt will work too)

Place the bread on a plate. Spread a generous spoonful of guacamole. Top with the radish slices. Place egg slices on top of the radish slices. Sprinkle with smoked salt.

 
Guacamole  

1 large avocado
fresh lime juice from half a lime
¼ teaspoon salt
freshly ground black pepper
cilantro leaves (optional)

Cut the avocado in half using a sharp, thin knife and carefully remove the seed. Scoop out the avocado flesh with a spoon into the bowl. Mash the avocado with a fork. Squeeze lime juice on the mashed avocado, sprinkle the salt and pepper, and mix everything well together using a fork. Toss in some cilantro leaves and mix well. Adjust the salt and pepper to taste.

Saturday, May 4, 2013

April Memories and Gluten-Free Coconut-Banana-Ginger Petite Cakes

April was a special month… It was full of lovely memories and the promise of a new beginning. However, it was also a month of paperwork, applications, government office visits, and a few ailments. The work part is over with and I can finally welcome May with a sense of freedom, however the illnesses are still here to stay. Thank goodness for a sweet husband who treats me like a princess.   


DFJ and I got married on April 6th and it was the sweetest moment in my life. When the going gets tough, all I need to do is close my eyes and go back to that moment in time. It will remind me that life is wonderful and everything will be just fine. So far, we are definitely soaking up the newlywed life… I am just so happy to know that I get to spend the rest of my life with DFJ by my side!   

The weeks that followed after our wedding were busy. I didn’t know that name changing requires several stops, here’s the list for those who might need it someday:
1.      First stop: Social Security Office
2.      Department of Licensing
3.      Employer (in my case, my employer changed my name for my insurance too)
4.      Insurance companies
5.      Bank(s)
6.      Department of Motor Vehicles (DMV to change the name on your title)
7.      Passport
8.      I might have missed a few or many more, but this is a good list to start with.

Applying for a Greencard was equally busy. Oh my goodness! Mountains of paperwork, collecting documents (birth certificate, passport, H1B paperwork, proof of employment, bank statements, pay stubs, photocopies of tax forms, etc.), photos for the application, blood work, TB skin test, a physical, and the double checking of everything. However, all that work is done and over with and my application is ready to be sent to USCIS! Woohoo!

There was also some fun that happened after a few weeks of running errands. I had a belated bachelorette party courtesy of my wonderful girlfriends, Elissa and Melissa. It was so much fun and I didn’t realize how long it has been since I had some girly time with my friends. We drank some key lime margaritas, ate some fabulous Mexican fare, and a delicious carrot cake. 


Yes, all of that happened in April, plus more… There were some days of yoga, weights, running, walking, and hiking. During one or a succession of these activities, I strained my right hamstring and hip flexor. It’s very minor but since I have been ignoring my condition for 2 weeks, it has taken longer to heal. If I just listened to my body when it first told me to slow down, I would have been good as new today. So, lesson learned: take it easy when your body tells you too, be patient and rest as needed, and do not rush recovery. The only upside to this injury is my husband’s loving massages.

My body is also doing something to me that is even more annoying than my hamstring injury. I have been feeling this weird lump in the back of my throat for around two weeks now. It feels like a glob of phlegm (excuse the grossness) that I can cough up but can’t because it’s not. The doctor said it might be acid reflux and I should avoid spicy, greasy, and high fat content foods, chocolate, coffee, wine, and not eat or drink liquids at least two hours before bed time. Soooooooo sad! On the bright side, I could use this time to really rethink our eating habits. DFJ and I eat dinner pretty late and go to bed late. Also, even though we don’t eat too much chocolate, we definitely do not need so much sweet stuff all the time. Now might be a good time for a diet tune-up.   

I have very recently experimented with vegan, gluten-free baking using teff flour and coconut oil, so after I saw Cookie and Kate’s Gluten-Free Chocolate Chip Cookies, I knew I had to try it. Oh my goodness, they were sooooo good! However, I must not have used enough almond meal and coconut flour because they didn’t turn out all pretty and puffed up like hers did. Mine spread out too much but I didn’t care… they tasted so good, I ate four cookies hot off the pan! I even brought some to an 8-mile day hike at Eagle Creek, OR with DFJ and friends and the cookies were a hit.


That was the first time I used coconut flour ever. What a revelation! Coconut flour is like heaven… it smells so sweet and nutty and just amazing. Almond meal is just ground up almonds. I love them in baked goods as they make them more filling and nutritious with a nice chew factor.

What I initially wanted to do was remake Kathryne’s cookies, but since chocolate is not an option for me these days, I had to skip on that. Also, I didn’t want to use too much honey and coconut oil because we are running out of those (both of which are kinda expensive), so I cut those ingredients by half and substituted the wet ingredients with overripe bananas instead. And since bananas are in there, why not throw in crystallized ginger in the mix?  


Our apartment smelled so lovely while these lovely little things were baking. Since it was late and my eating hours were over, I had to be patient and wait until the morning to enjoy them. These petite cakes are incredibly delightful! I call them cakes because the texture is just like cake. Soft, billowy, sweet, crunchy-chewy banana bites with hints of ginger here and there. It is possible to achieve such loveliness even without regular flours, butter, sugar, and eggs!  


These petite cakes are lovely with creamy plain yogurt for breakfast, perfect for pre and post workout snacking (or just snacking), and also makes for a delicious dessert!     


Gluten-Free Coconut-Banana-Ginger Petite Cakes (Yields 34 cookies)
Inspired from Cookie and Kate’s Gluten-Free Chocolate Chip Cookies

1 cup almond meal, 110 g (from raw slivered almonds ground in a blender)
1/3 cup coconut flour, 50 g
1 tsp baking soda, 5 g
1/2 tsp baking powder, 2 g
1/2 tsp fleur de sel, 2 g
1/4 cup crystallized ginger, minced, 40 g


1/4 cup honey, 105 g
1/4 cup melted coconut oil, 50 g
1 tsp vanilla extract, 5 g
2 small very ripe bananas, mashed with a fork or potato masher, 198-200 g

Preheat the oven to 350 degrees F. Line a baking sheet with parchment paper.

Place the almond meal, coconut flour, baking soda, baking powder, and fleur de sel in a large mixing bowl. Whisk everything very well together. Toss in the minced crystallized ginger and once again, whisk well together. The ginger pieces tend to clump together, so use your fingertips to separate them.  

In a medium size mixing bowl, stir well together the honey, coconut oil, and vanilla. Stir in the mashed bananas and mix until everything is well-combined.

Slowly pour in the wet mixture into the dry mixture and stir everything together with a wooden spoon until well incorporated. Using a flexible spatula, scrape the sides and bottom of the bowl to make sure that no dry ingredients are left.

Let the batter sit for 5 minutes to allow more moisture to soak into the dry ingredients. Using a cookie or ice cream scoop, scoop the batter one spoonful at a time onto the prepared baking sheet, leaving about an inch of space around each mound. Bake at 350 degrees F for 18-20 minutes until the top turns a nice golden brown.    

Cool the baking sheet on a cooling rack. Allow the petites to cool completely before transferring to an airtight container. These are great eaten right away or even when they are a few days old as the banana flavor intensifies!

Enjoy!